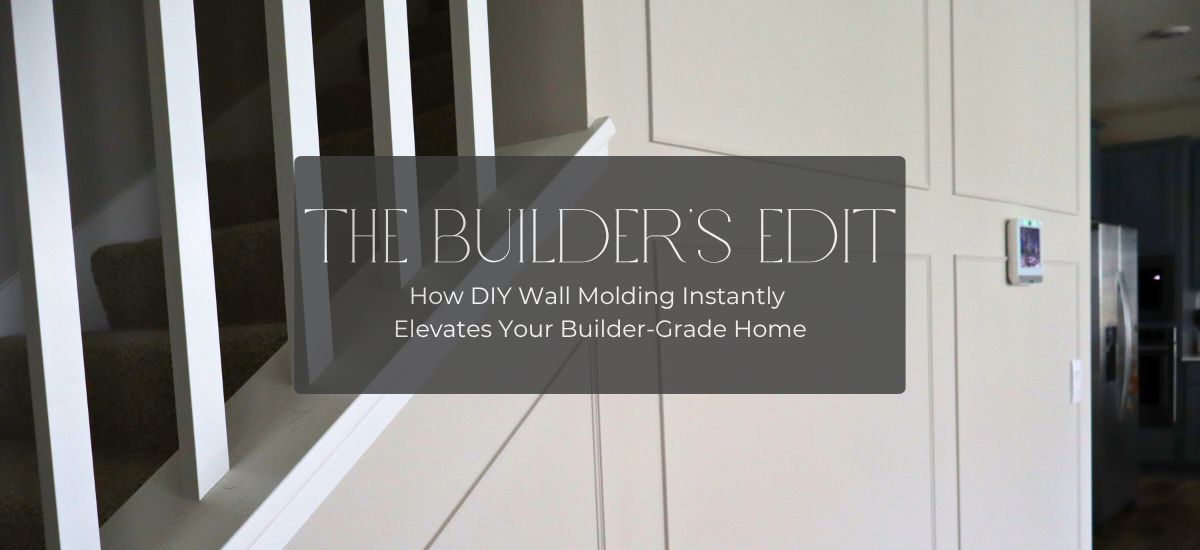
How DIY Wall Molding Instantly Elevates Your Builder-Grade Home
|
|
Time to read 10 min

Soft light, layered warmth, and the kind of comfort that asks you...
Your cart
|
|
Time to read 10 min
Your walls don’t have to stay blank or “builder grade” forever. This is your cozy permission slip to add a touch of character without breaking the budget or stressing about perfection. With DIY wall molding, you can transform a simple walkway or living room into a space that feels warm, intentional, and uniquely yours.
💡 Did you know
Adding DIY wall molding is one of the easiest ways to boost your home's value and charm. Even simple box molding can make a builder-grade space look high-end, giving you that custom-home feel without the custom-home price tag. It's proof that a little detail can go a long way - both in design and in resale appeal.
When we moved into our builder-grade home, I remember staring at the flat, blank walls and thinking, this space just doesn’t feel finished. Enter DIY wall molding. Adding molding isn’t just about looks — it’s about creating a space that feels elevated, cozy, and custom without a huge renovation budget.
The beauty of DIY wall molding is that it’s one of those small change, big reset projects. It doesn’t require professional-level tools or design expertise. One afternoon of measuring, cutting, and nailing can make your home feel brand new. And here’s the best part: it doesn’t have to be perfect. A slightly uneven corner or imperfect paint line won’t ruin the effect. Because at the end of the day, your home isn’t supposed to look like a magazine — it’s supposed to feel like you
Molding comes in many styles, and there’s no one-size-fits-all. Here are a few common approaches you might consider before diving into your own project:
Wainscoting: Traditional and timeless, usually added to the lower third of the wall.
Picture Frame or Box Molding: Clean boxes or rectangles that bring structure and interest.
Chair Rail Molding: A classic line of molding across the wall, typically about ⅓ of the way up.
Board and Batten: Vertical strips of molding for a cottage-cozy vibe.
For this project, I chose box molding for our main living/walkway space. It’s simple, flexible for different wall sizes, and looks so polished without being overwhelming.
Before you dive into your project, make sure you’ve got the right tools on hand. Having everything ready makes the process smoother and keeps the momentum going. Here’s a basic list to get you started:
Skinny Trim Molding (1/4" x 13/32") — We went with a slimmer trim profile since this wall sits in a high-traffic hallway. The thinner depth keeps it from sticking out too far while still adding that elevated, finished look.
Miter Trim Shears or Miter Saw — Miter shears are a great beginner-friendly tool for cutting trim at clean angles without the noise or mess of a saw. They’re perfect for simple box molding projects. If you’re doing something more structural like board and batten, a miter saw will give you the precision and power you need.
Measuring Tape — A must for ensuring your boxes are even and symmetrical. Take your time on this step—it sets the tone for how polished the final result looks.
Level (preferably 4 ft) — This keeps your trim straight and aligned, even on slightly uneven walls. A longer level helps make sure everything lines up across your space.
Ryobi Brad Nail Gun (18-Gauge) — A cordless option like the Ryobi 18G brad nailer makes installing trim fast and frustration-free. It’s lightweight, easy to handle, and gives a professional finish.
18-Gauge Nails — These work perfectly with the brad nail gun to securely hold trim in place without splitting the wood.
Behr Rapid Dry Caulk — Caulking is key for clean, seamless lines between the trim and wall. This quick-dry formula saves time without sacrificing results.
Ryobi Electric Caulk Gun — If you’re tackling a larger project, this tool makes caulking effortless. It provides steady pressure and a smooth bead every time—no hand cramps required.
Paint — Choose a durable wall paint that complements your room’s tone. A satin or semi-gloss finish is ideal for trim—it’s easy to clean and gives a subtle sheen.
Roller Kit — A small roller and brush set helps achieve smooth, even coverage. Use the brush for edges and corners, and the roller for broad sections.
The best part? Most of these are beginner-friendly and easy to use. That’s why DIY wall molding is such a great project — you don’t need a workshop full of specialty tools to get professional-looking results.
Disclosure: This post may contain affiliate links. If you choose to shop through them, we may earn a small commission — always at no extra cost to you. We only share what we truly love and believe in.
Here's the part where I remind you: If I can do it, so can you. I'm not a pro builder - just someone who wanted to make our home feel a little more finished and a lot more "us." This DIY wall molding project was one of those small, approachable changes that gave our walkway and instant sense of warmth and intention. Here's exactly how I did it:
Before picking up a saw or brush, I always start with a plan. For this project, that meant deciding how many boxes I wanted, how tall they should be, and how they would look as you walk through the space.
Most people follow the typical design rule of placing box molding either at ⅓ or ⅔ of the wall height. But I wanted ours to feel custom — something that made sense for our actual home, not just a Pinterest formula. So instead, I aligned the top of the bottom box molding with where our stair railing base landed, creating a seamless visual line as you walk from one area to the next. It’s a small detail, but it makes the whole space feel more cohesive.
Once you’ve decided on placement, use painter’s tape or a pencil to map out your boxes on the wall. I used a pencil and tape measurer to map out 5" spaces between the wall edges and boxes. I also used a 4' level to guide my pencil lines, as it makes it easier later on you go to attach your trim pieces. This step helps you visualize proportions before committing. Don’t worry if it’s not perfect — you can always adjust before you start cutting.
There are so many options for trim, from ornate to minimal. I went with something clean and simple — a smaller version of the typical molding style that complements our home’s modern nature-inspired feel.
When selecting your molding, think about the overall look you want. Thinner trim gives a subtle, structured effect, while wider pieces make a bold statement. Either way, choose a consistent size for all pieces to keep your design balanced.
And remember, this is a DIY wall molding project — you don’t need anything fancy. MDF or lightweight pine trim works beautifully and is easy to cut, paint, and install.
This step is where the magic starts to happen. Once you’ve measured everything out, grab your trim scissors and start cutting your first piece. Each piece should have clean 45-degree angles on the ends so they fit together neatly at the corners.
When I first started, I was nervous about getting every cut perfect — but the truth is, caulk is your best friend. A small gap or slightly uneven joint can easily be smoothed over later. So don’t let perfectionism slow you down.
After cutting, I lined up each piece to the pencil line on the wall, then attached the molding with a nail gun. (Finishing nails and a hammer work too if you don’t have a nail gun — it just takes a little more patience.) By completing Step 1 by leveling out your pencil lines in advance, you save yourself from trying to hold the level, trim piece, and nail gun all at once.
Step back after each box to make sure it looks even on the wall. Seeing it come together piece by piece is the best motivation to keep going!
Once the trim is all up, it’s time for the finishing touches. Use paintable caulk to fill in any gaps or seams where the molding meets the wall. This step instantly elevates your DIY wall molding — it’s what makes it look built-in and professional.
After the caulk dries, sand any rough spots, wipe the surface clean, and get painting. I painted the molding and walls the same color for a subtle, seamless look that makes the room feel taller and more cohesive. But if you want something bold, go for contrast — darker molding on a light wall can make a beautiful statement.
Pro tip: Use a satin or eggshell finish for a soft sheen that’s easy to clean and still feels cozy.
This is the fun part — seeing how that one small change completely transforms your space. Once our paint dried, I moved furniture back in, added a few cozy layers (pillows, throw blankets), and took a step back.
The difference was instant. The DIY wall molding gave our walkway character and warmth that it never had before. It’s proof that you don’t need a full renovation to make your home feel thoughtfully designed. Just a few pieces of trim, a little patience, and some good music (cue the DIY Days playlist below ↓).
The end result? Walls that look like they belong in a high-end custom build — but you did it yourself.
Here’s the part where I remind you: this project doesn’t have to be flawless to be beautiful. Our box molding has a few corners where the caulk line isn’t 100% straight. You know what? Nobody notices. What they do notice is how much cozier and finished the space feels.
We live in our homes — kids leave fingerprints, dogs skid across the floors, toys pile up in the corners. And that’s the point. DIY wall molding isn’t about creating a Pinterest-perfect showroom. It’s about giving your family a backdrop that feels warm, inviting, and truly yours.
Because transformation doesn’t have to mean demolition. Wall molding is one of those rare upgrades that feels like magic — budget-friendly, beginner-friendly, and wildly impactful. If you can measure and paint, you can do this. And once you do, your space will feel more intentional, more storied, more yours.
It’s proof that you don’t need to gut your kitchen or add square footage to feel proud of your home. Sometimes the most powerful updates are the simplest. A few strips of trim, a weekend of quiet focus, and suddenly your walls are telling a new story — one that can shift with the seasons or your style. Paint it bold now, soften it later. Let it grow with you.
This is beauty made by hand. A gentle rebellion against builder-grade sameness. A way to say, “I live here. I care.”
Every DIY project feels a little more fun when there’s good music playing in the background. For me, adding DIY wall molding to our walkway wasn’t just about nails and paint — it was about creating a whole vibe while I worked. Music kept the energy up, made the repetitive parts (hello, caulking) more enjoyable, and turned the project into something I actually looked forward to.
Here’s a peek at what I had on repeat while working on this project:
Upbeat Pop Hits – perfect for measuring and cutting trim. Think dance-around-the-room songs that make even the math part fun.
Classic Rock Sing-Alongs – when I’m painting, I want something familiar and fun. A little Fleetwood Mac or Tom Petty makes the time fly.
Family-Friendly Mixes – sometimes little helpers join in, so I’ll throw in fun tracks we can all hum along to.
I actually keep a running playlist called “DIY + Decor Days” that I turn on whenever I tackle a home project. It’s full of songs that feel motivating but also cozy—like the soundtrack to making our house a little more ours.
If you try this project, I highly recommend curating your own playlist (or borrowing mine!) because good music makes the sawdust and paint drips part of the memory.
Affiliate Disclosure:
Some of the links in our posts are affiliate links, which means we may earn a small commission if you choose to make a purchase — at no additional cost to you. We only share products and partners that align with our values of intentional living, nature-rooted design, and everyday beauty. Every recommendation is made with care, and helps support the work we do to bring soulful transformation to your home.
Thank you for being part of this journey.
The author: Tori Williamson
Tori is the founder and creative director of Loonstead Living, where she designs nature-rooted home goods inspired by motherhood, lake stillness, and the quiet magic of everyday life. As a mom of two, she understands the beauty and chaos of family living and creates products that bring warmth, intention, and a sense of calm to the spaces we call home.
Elevate Your Space
Turn builder grade basics into cozy, elevated living with Loonstead Living's curated textiles and home decor. Thoughtfully chosen to bring warmth, texture, and ease into your everyday spaces.


